Arduino Tips
Debug Arduino Nano with debug wire
I like the AVR micro controller series, and the AVR Studio is a pretty descent IDE too,
and free. On the other hand, I really don't like the Arduino IDE, especially missing
in circuit debugging is a show stopper to me.
However what I do like about Arduino is the cheap development boards, take Arduino Nano,
for instance, which can be bought for just a few bucks. Unfortunately when you buy it
it will not be able to be debugged using debug wire. While it has an ISP socket, and
you can enable debug wire, you won't be able to do anything else. You can't even switch
back to ISP mode because debug wire is not functional.
The reason is that the USB interface is connected to the reset pin. So first thing is to
remove that connection. Fortunately there is a capacitor between the USB interface and
the ATMEGA, so it's an easy fix to just remove that.
Unfortunately on many Chineese clones the pull up resistor on the /Reset pin is only 1k,
which is too low for debug wire to be operational. Therefore you need to ensure that the
/Reset pull up resistor is at least 4-5k. I replace it with a 10k resistor, and
everything now works perfectly.
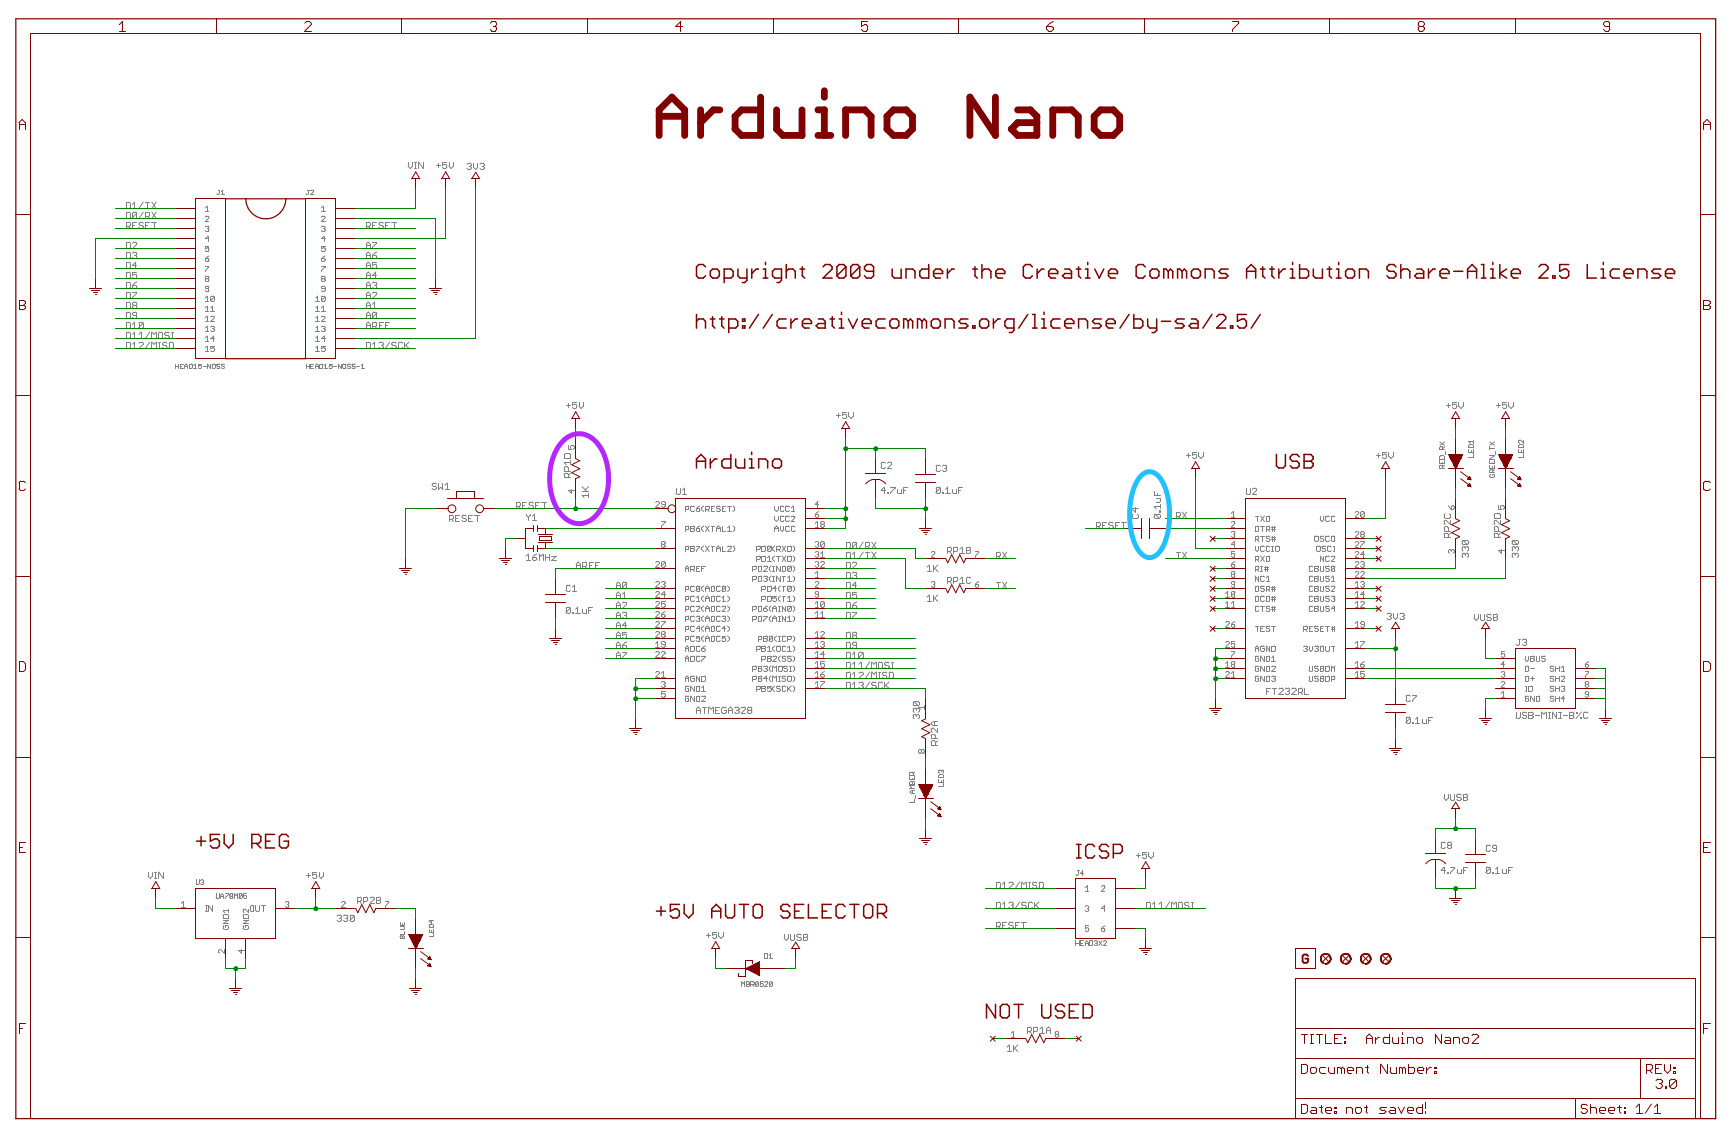
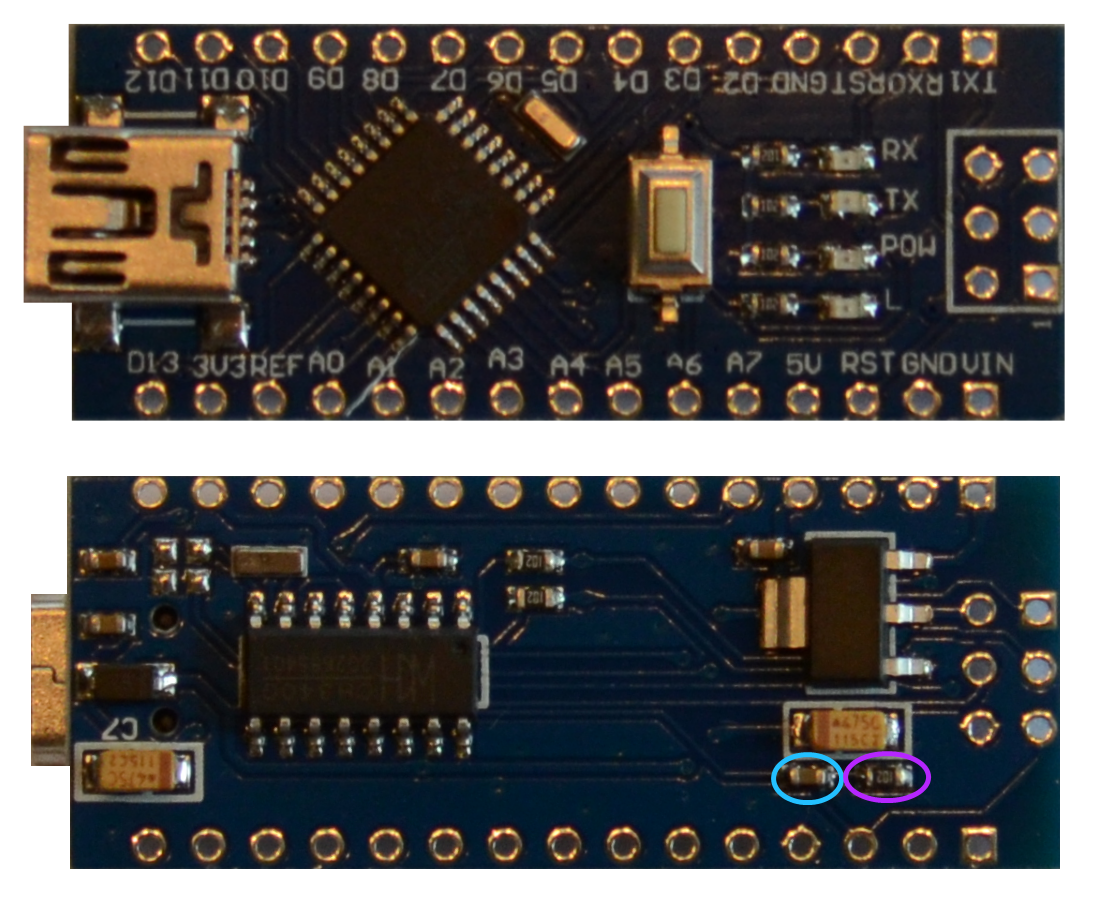
The cyan circle on the above images shows the capacitor that needs to be removed, and
the magenta circle shows the resistor that must have a sufficiently high resistance.
Click on the images to see them in full size.
|